

Click to enlarge.
Patrick Troughton (The Second Doctor) said it best:
Similarly; I update my blog regularly when I’m out of work, and you can tell how long I’ve been out of work based on my updates. That said, let me share with you an activity I do with my class when we’re doing space as a unit of work.
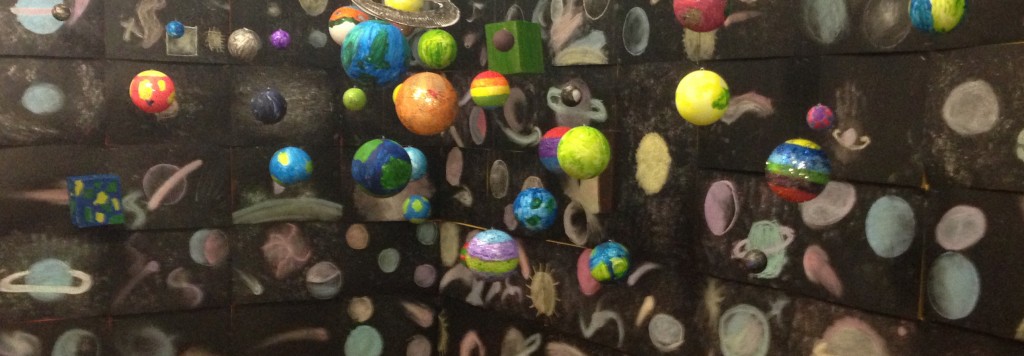
A different angle.
This is a galaxy made by my Year 4/5 class on a backdrop they also made with chalk art. The materials needed include:
- Styrofoam shapes,
- Coloured paint,
- Skewers,
- Fishing line,
- Adhesive wall hooks,
- Black cardboard,
- Coloured chalk,
- Ziplock bags; and optionally
- Fixative.
During our space unit, we looked and studied different aspects of our galaxy. When it came to this activity, I decided to let the kids either create their own planet or recreate a known planet. Unfortunately, I don’t have pictures for each step, so you’ll need to use your imagination for those missing areas where a picture would fit in nicely. 🙂
We started off creating our planets as they’ll be the messiest and need time to dry. Everyone drew a basic draft picture of what they wanted their planet to look like. This was a simple guide so no one would be staring at their object blankly when it came to the painting time. Once this was done, the kids chose a shape based on a selection of shapes that I bought from a craft shop. Most where spheres, but I also got a few blocks as I knew what some of the students would be likely to do when given a free choice.
With paint handed out, paint shirts on, and newspaper layed everywhere I skewered each of their shapes so the kids had something to hold on to while painting so their fingers didn’t get messed up.


To let our planets dry, we stuck them, still attached to their skewers, into buckets of sand. While they were drying, we moved onto our backgrounds.
To make the backgrounds, we used black cardboard, chalk and a ziplock bag. In the spirit of pictures speaking a thousand words…

Step 1: Heavily rub chalk around the front of your asteroid design.

Step 2: Using your clean finger, smear the thickly rubbed chalk downward to make the asteroid’s tail.

Step 3: Add a second, lighter colour to the middle of your asteroid for extra design.

Step 4: Crunch two pieces of white chalk together to sprinkle your ‘stars’ around the picture.

Step 5: Firmly pat down (not rub or smudge) your stars so they stay on the cardboard. Alternatively, you can use fixative here to keep them on the page. I’ve never used fixative, though.

Voilà!
With all of our backgrounds made, we stapled them together on out display board. When doing this again, I’d recommend taping them together from behind so they stick together better and give a better effect. As you can see from the first two pictures at the top of the page, when using staples, you can see the board behind them. Put in the extra effort and tape them together so you can’t see the board.
Now it’s just a matter of hanging the planets in front of the galaxy background. I did this using adhesive hooks and fishing line.

An elaborate web of fishing line anchored by adhesive hooks.
It’s not pretty, but you could hide this ‘behind the scenes’ work with black crepe paper lightly stewn over the top if you wanted.
When completed, you get this.

Enjoy. 🙂