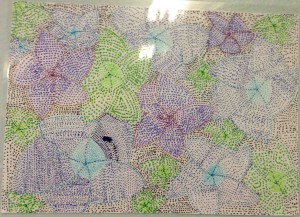
I’d like to share with you a small activity I did with Stage 3 this week. It was an art activity using the technique of pointillism.
What is pointillism?
Glad you asked. In a nutshell, it’s basically replacing the act of colouring a picture in the traditional sense, with that of dots. Many, many different coloured dots. Your positioning and shades of the dots are what give your picture its colour and depth.
Here are some work samples from Stage 3. Our theme was spring time. Excuse the light glare as I laminated the final products and that’s what is causing the reflection.


Here is the SMART Notebook presentation I made and used for the introduction. It’s nothing deep, but it got the point (heh) across.
A few notes on the Notebook file:
* On the first page, I would tap my finger around the blank areas making dots (points) on the board while asking the students if they know what pointillism is. This starts of the discussion.
* The colour wheel on page two was used to demonstrate the differences between warm and cool colours. It’s best to start with cool colours then add your warmer colours as your work progresses.
* Pages three, four and five were taken from the Art Attack entry on pointillism.
* Seeing our theme was the spring time, the final three pages were used give ideas for their spring time drawings. I also had some photocopies of these pages available for students to lightly trace over.
Hopefully this may give you some inspiration for a similar art activity, or as usual, something to build on and make better.

Pingback: Fabulous 5S » Halloween Pointilism Artworks